前些天发现了一个巨牛的人工智能学习网站,通俗易懂,风趣幽默,忍不住给大家分享一下。点击跳转到网站:https://www.captainai.net/dongkelun

前言
学习总结Flink SQL Checkpoint的使用,主要目的是为了验证Flink SQL流式任务挂掉后,重启时还可以继续从上次的运行状态恢复。
验证方式
Flink SQL流式增量读取Hudi表然后sink MySQL表,任务启动后处于running状态,先查看sink表有数据,然后将对应的yarn kill掉,再通过设置的checkpoint重启任务,任务重启后验证sink表的数据量。Flink SQL流式增量读取Hudi表可以参考:Flink SQL增量查询Hudi表
版本
- Flink 1.14.3
- Hudi 0.13.0
Checkpoint 参数
一般需要设置的常用参数1
2
3
4
5
6
7
8
9-- checkpoint间隔时间,单位毫秒,没有默认值,如果想开启checkpoint,需要将该参数设置一个大于0的数值
-- 如果想提升sink性能,比如写hudi,需要将该值设置大一点,因为间隔时间决定了批次大小
-- checkpoint间隔时间不能设置太短也不能设置太长,太短影响写入性能,太长影响数据及时性。
set execution.checkpointing.interval=1000;
-- 保存checkpoint文件的目录
set state.checkpoints.dir=hdfs:///flink/checkpoints/hudi2mysql;
-- 任务取消后保留checkpoint,默认值NO_EXTERNALIZED_CHECKPOINTS,
-- 可选值NO_EXTERNALIZED_CHECKPOINTS、DELETE_ON_CANCELLATION、RETAIN_ON_CANCELLATION
set execution.checkpointing.externalized-checkpoint-retention=RETAIN_ON_CANCELLATION;
从checkpoint恢复
1 | set execution.savepoint.path=hdfs:///flink/checkpoints/hudi2mysql/255bdd01cee7486113feb1cbe8b45ee0/chk-1314; |
其他参数
1 | -- checkpoint模式,默认值EXACTLY_ONCE,可选值:EXACTLY_ONCE、AT_LEAST_ONCE |
Checkpoint 目录结构
1 | /user-defined-checkpoint-dir |
验证
创建Hudi和MySQL物理表
Hudi表1
2
3
4
5
6
7
8
9
10
11CREATE TABLE hudi_source (
id int PRIMARY KEY NOT ENFORCED,
name string,
price double,
ts bigint,
dt string
)
WITH (
'connector' = 'hudi',
'path' = '/tmp/hudi_source'
);
MySQL表1
2
3
4
5
6
7
8
9
10CREATE TABLE `sink_mysql` (
`id` int(11) NOT NULL,
`name` text,
`price` double DEFAULT NULL,
`ts` int(11) DEFAULT NULL,
`dt` text,
`insert_time` timestamp NULL DEFAULT CURRENT_TIMESTAMP COMMENT '创建时间',
`update_time` timestamp NULL DEFAULT CURRENT_TIMESTAMP ON UPDATE CURRENT_TIMESTAMP COMMENT '更新时间',
PRIMARY KEY (`id`)
) ENGINE=InnoDB DEFAULT CHARSET=utf8;
造数1
2
3insert into hudi_source values(1,'hudi1',11.1,1000,'20230301');
insert into hudi_source values(2,'hudi2',22.2,1000,'20230301');
......
流读Hudi写MySQL
hudi2mysql.sql1
2
3
4
5
6
7
8
9
10
11
12
13
14
15
16
17
18
19
20
21
22
23
24
25
26
27
28
29
30
31
32
33
34
35set yarn.application.name=hudi2mysql;
set execution.checkpointing.interval=1000;
set state.checkpoints.dir=hdfs:///flink/checkpoints/hudi2mysql;
set execution.checkpointing.externalized-checkpoint-retention=RETAIN_ON_CANCELLATION;
CREATE TABLE hudi_source_incr (
id int PRIMARY KEY NOT ENFORCED,
name string,
price double,
ts bigint,
dt string
)
WITH (
'connector' = 'hudi',
'path' = '/tmp/hudi_source',
'read.streaming.enabled' = 'true',
'read.start-commit' = '202302',
'read.streaming.check-interval' = '4'
);
create table sink_mysql (
id int PRIMARY KEY NOT ENFORCED,
name string,
price double,
ts bigint,
dt string
) with (
'connector' = 'jdbc',
'url' = 'jdbc:mysql://192.168.44.128:3306/cdc?useSSL=false&useUnicode=true&characterEncoding=UTF-8&characterSetResults=UTF-8',
'username' = 'root',
'password' = 'password',
'table-name' = 'sink_mysql'
);
insert into sink_mysql select * from hudi_source_incr;
执行上面的SQL
1 | bin/sql-client.sh -f sql/hudi2mysql.sql |
这样我们启动了一个常任务,在Flink界面上可以看到checkpoint的相关信息,如下图显示了checkpoint具体文件地址
可以用hdfs命令看一下checkpoint路径下有哪些文件1
2
3drwxr-xr-x - hive hdfs 0 2023-03-01 14:47 hdfs:///flink/checkpoints/hudi2mysql/255bdd01cee7486113feb1cbe8b45ee0/chk-589
drwxr-xr-x - hive hdfs 0 2023-03-01 14:36 hdfs:///flink/checkpoints/hudi2mysql/255bdd01cee7486113feb1cbe8b45ee0/shared
drwxr-xr-x - hive hdfs 0 2023-03-01 14:36 hdfs:///flink/checkpoints/hudi2mysql/255bdd01cee7486113feb1cbe8b45ee0/taskowned
其中255bdd01cee7486113feb1cbe8b45ee0为flink的jobid

将yarn任务kill1
yarn app -kill application_1676855463066_0177
再看一下,发现checkpoint文件还在1
hdfs:///flink/checkpoints/hudi2mysql/255bdd01cee7486113feb1cbe8b45ee0/chk-1314
重启任务验证checkpoint效果
需要先在hudi2mysql.sql,添加下面的配置1
2-- 从该checkpoint文件对应的状态恢复
set execution.savepoint.path=hdfs:///flink/checkpoints/hudi2mysql/255bdd01cee7486113feb1cbe8b45ee0/chk-1314;
重启flink sql任务
1 | bin/sql-client.sh -f sql/hudi2mysql.sql |
我们可以在新启动的yarn界面上看到,最新的恢复点,和我们设置的一样,这样代表我们设置恢复点生效
最后再造几条新的增量数据,在MySQL里看验证以下数据量是否一致
1 | insert into hudi_source values(3,'hudi3',33.3,1000,'20230301'); |
MySQL数据量一致,且更新时间和插入时间一致,代表id=1、2的数据重启时没有重复消费,达到了预期效果。(也可以对MySQL表不设置主键,直接通过验证数据量验证效果)
这样我们通过一个简单的示例,了解了checkpoint的具体使用。大致过程
1、设置开启checkpoint和保存的路径,
2、任务运行时会根据设置的时间间隔不断生成新的ckp文件,
3、等任务挂掉后,重启任务时先设置execution.savepoint.path为我们最后一次保存的ckp文件
这样就达到了任务重启时继续从上次的运行状态恢复。
Checkpoint和Hudi
流任务写hudi时,必须设置checkpoint,不然不会生成commit,感觉像是卡住一样,具体表现为只生成.commit.requested和.inflight,然后不写文件、不生成.commit也不报错,对于新手来说很费劲,很难找到解决方法。
大概原因是因为写文件、生成commit的动作是在coordinator里面,只有当checkpoint完成后才会调用coordinator,所以不设置checkpoint就不会生成commit,这里的逻辑是在Hudi源码里(具体没看),也就是说checkpoint和生成hudi commit是绑定一起的,这样才能保证流写Hudi的事务性,从而保证checkpoint的EXACTLY_ONCE。
StateBackend
在启动 CheckPoint 机制时,状态会随着 CheckPoint 而持久化,以防止数据丢失、保障恢复时的一致性。 状态内部的存储格式、状态在 CheckPoint 时如何持久化以及持久化在哪里均取决于选择的 State Backend。
在学习Flink SQL Checkpoint时,发现网上的资料有下面的这个配置,本来以为这样设置后,就会将checkpoint文件保存到文件系统中,后来发现并不是这样。并且官网文档和源码描述的也不是很清楚,所以专门研究了一下这一块1
set state.backend=filesystem;
从 Flink 1.13 版本开始,社区改进了 state backend 的公开类,进而帮助用户更好理解本地状态存储和 checkpoint 存储的区分。 这个变化并不会影响 state backend 和 checkpointing 过程的运行时实现和机制,仅仅是为了更好地传达设计意图。 用户可以将现有作业迁移到新的 API,同时不会损失原有 state。
旧版本的 MemoryStateBackend 等价于使用 HashMapStateBackend 和 JobManagerCheckpointStorage。
新版本的有两个参数state.backend和state.checkpoint-storage
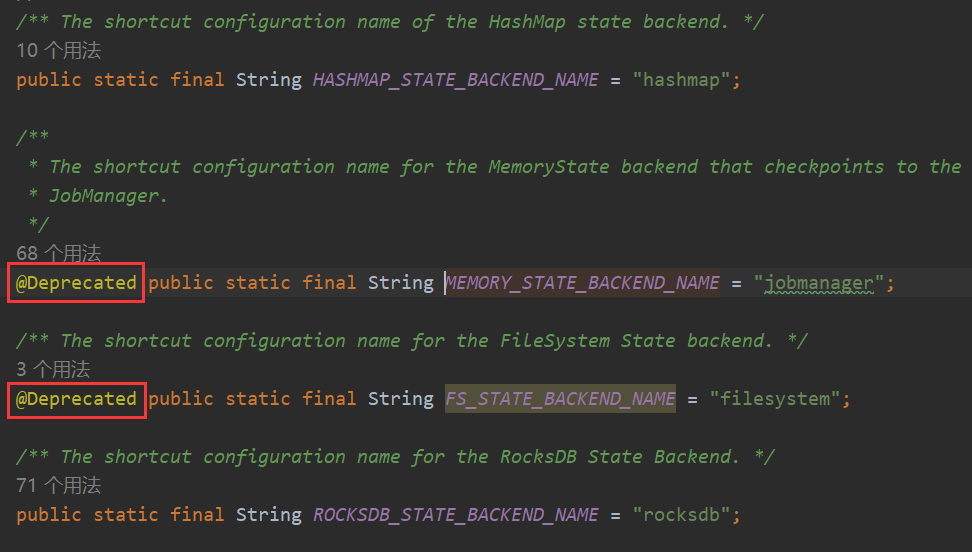
state.backend可选参数:hashmap、roksdb,另外也支持filesystem(弃用)和jobmanager(弃用),官方文档并没有说明filesystem和jobmanager已经弃用

只设置state.backend:
| state.backend | Checkpoint Storage | State Backend |
|---|---|---|
| 默认 | JobManagerCheckpointStorage | HashMapStateBackend |
| hashmap | JobManagerCheckpointStorage | HashMapStateBackend |
| filesystem(弃用) | JobManagerCheckpointStorage | HashMapStateBackend |
| roksdb | JobManagerCheckpointStorage | EmbeddedRocksDBStateBackend |
| jobmanager (弃用) | MemoryStateBackend(弃用) | MemoryStateBackend (弃用) |
总结:对于State Backend,只有HashMapStateBackend和EmbeddedRocksDBStateBackend,另外还有一个弃用的MemoryStateBackend
state.checkpoint-storage可选参数:jobmanager、filesystem,当设置了state.checkpoints.dir,flink会自动使用filesystem对应的FileSystemCheckpointStorage
只设置state.checkpoint-storage:
| state.checkpoint-storage | Checkpoint Storage | State Backend |
|---|---|---|
| 默认 | JobManagerCheckpointStorage | HashMapStateBackend |
| jobmanager | JobManagerCheckpointStorage | HashMapStateBackend |
| filesystem | FileSystemCheckpointStorage | HashMapStateBackend |
| 设置state.checkpoints.dir | FileSystemCheckpointStorage | HashMapStateBackend |
总结:对于Checkpoint Storage只有JobManagerCheckpointStorage和FileSystemCheckpointStorage
另外,当设置state.checkpoint-storage=filesystem时,必须同时设置state.checkpoints.dir,否则会有异常:1
Caused by: org.apache.flink.configuration.IllegalConfigurationException: Cannot create the file system state backend: The configuration does not specify the checkpoint directory 'state.checkpoints.dir'
其实可以不设置state.checkpoint-storage,当设置了state.checkpoints.dir时Checkpoint Storage 自动使用FileSystemCheckpointStorage,不设置的话就使用默认的JobManagerCheckpointStorage
一开始对于默认的JobManagerCheckpointStorage、HashMapStateBackend不是很理解,不明白这样的checkpoint有啥用,因为是保存到内存中,不是保存到文件系统中,所以任务挂掉后就没办法恢复。
后来发现这种默认保存在内存中的checkpoint可以用于flink作业失败时自动恢复,而不是任务挂掉后手动恢复,另外默认情况下,程序取消时也不保存checkpoint

其他总结
- 对于flink sql读取mysql,设置checkpoint恢复不生效(不是flink cdc)
- checkpoint 一个时间间隔内只有一个批次,这样才能保证eos,时间间隔大小影响写入性能
- 对于kafka2hudi的场景,checkpoint时间间隔如果比较小(1s),会因为时间不够导致第一个批次卡住,等超时(默认10分钟)后才会报错,所以需要间隔时间设置大一点,10s以上即可
- 默认情况,只有全部任务running才会生成checkpoint,可以通过参数修改:execution.checkpointing.checkpoints-after-tasks-finish.enabled=true
pipeline.operator-chaining
1 | set pipeline.operator-chaining=false; |
将该参数设置为false,实现将多个算子拆分,利于观察每个任务的运行情况。对于上面说的kafka2hudi的场景,本来只是为了观察任务卡住的原因,但是发现设置了该参数后,任务不卡了
原因是虽然官方文档说的是将该参数设置为false后,会影响性能,但是我测试的kafka2hudi的场景反而提升了性能~,所以不卡了(不增加checkpoint时间间隔的情况)
下面是我测试的结果,总数据量:1000万,checkpoint间隔:10s
| pipeline.operator-chaining | 第一个批次的数据量 | 第二个批次的数据量 | 第三个批次的数据量 | … | 总用时 |
|---|---|---|---|---|---|
| false | 774270 | 1409025 | 1552195 | … | 66s |
| true | 838610 | 896459 | 1245142 | … | 79s |


