前些天发现了一个巨牛的人工智能学习网站,通俗易懂,风趣幽默,忍不住给大家分享一下。点击跳转到网站:https://www.captainai.net/dongkelun

1、首先安装配置jdk1.8以上,建议全部的安装路径不要有空格
2、安装spark
2.1 下载
下载地址:http://spark.apache.org/downloads.html,我下载的是 spark-2.2.1-bin-hadoop2.7.tgz
2.2 安装
解压到指定路径下即可,比如 D:\Company\bigdata\spark-2.2.1-bin-hadoop2.7
2.3 配置环境变量
在系统变量Path添加一条:D:\Company\bigdata\spark-2.2.1-bin-hadoop2.7\bin 即可
3、安装hadoop
3.1 下载
下载地址:https://archive.apache.org/dist/hadoop/common/(需要和spark对应的版本保持一致,我选择的hadoop-2.7.1.tar.gz)
(此链接下载较慢,可选择其他镜像下载其他版本如:http://mirror.bit.edu.cn/apache/hadoop/common/)
3.2 安装
解压到指定路径下即可,比如 D:\Company\bigdata\hadoop-2.7.1
3.3 配置环境变量
在系统变量里添加 HADOOP_HOME:D:\Company\bigdata\hadoop-2.7.1
3.4 下载winutils.exe
1.下载地址:https://github.com/steveloughran/winutils(找到对应的版本下载)
- 将其复制到 %HADOOP_HOME% 即D:\Company\bigdata\hadoop-2.7.1\bin
3.5 解决/temp/hive 不可写错误
执行以下语句:D:\Company\bigdata\hadoop-2.7.1\bin\winutils.exe chmod 777 /tmp/hive 即可,参考:http://mangocool.com/1473838702533.html3.6 运行验证spark
在命令行输入:spark-shell,出现如下图所示即为成功(其中warn信息已在日志配置文件里去掉)
4、安装对应版本的scala(scala-2.11.8.msi)
4.1 下载
下载地址:https://www.scala-lang.org/download/all.html4.2 安装
一键式安装到指定目录:D:\Company\bigdata\scala4.3 配置环境变量
安装过程中已经自动配好4.4 验证
输入scala -version 查看版本号 ,输入scala 进入scala的环境
5、在eclipse上安装scala插件
5.1安装
在Eclipse中选择Help->Install new Software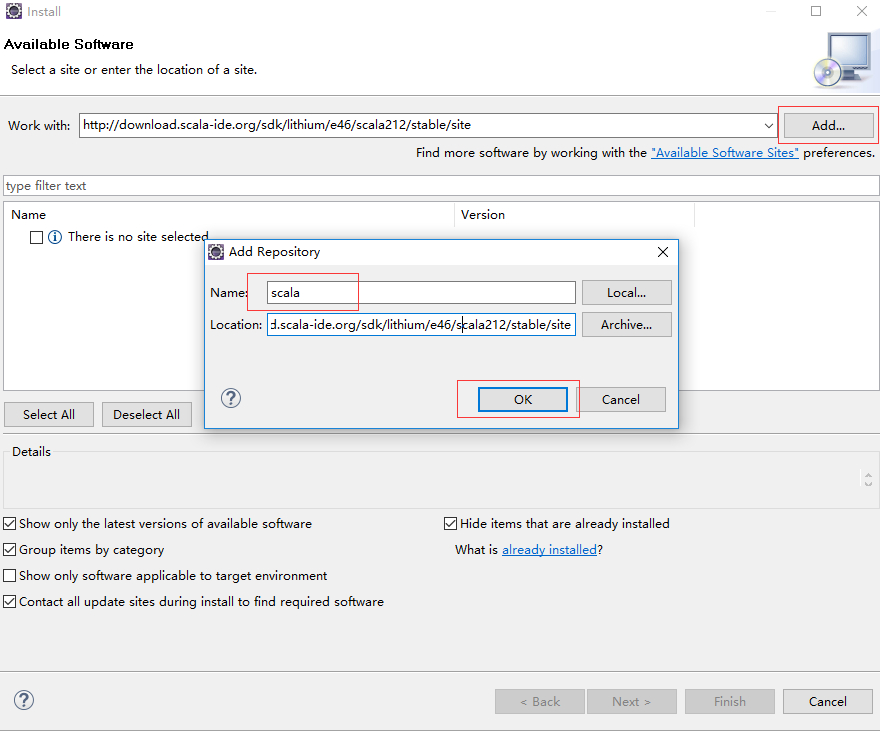
等待一会儿: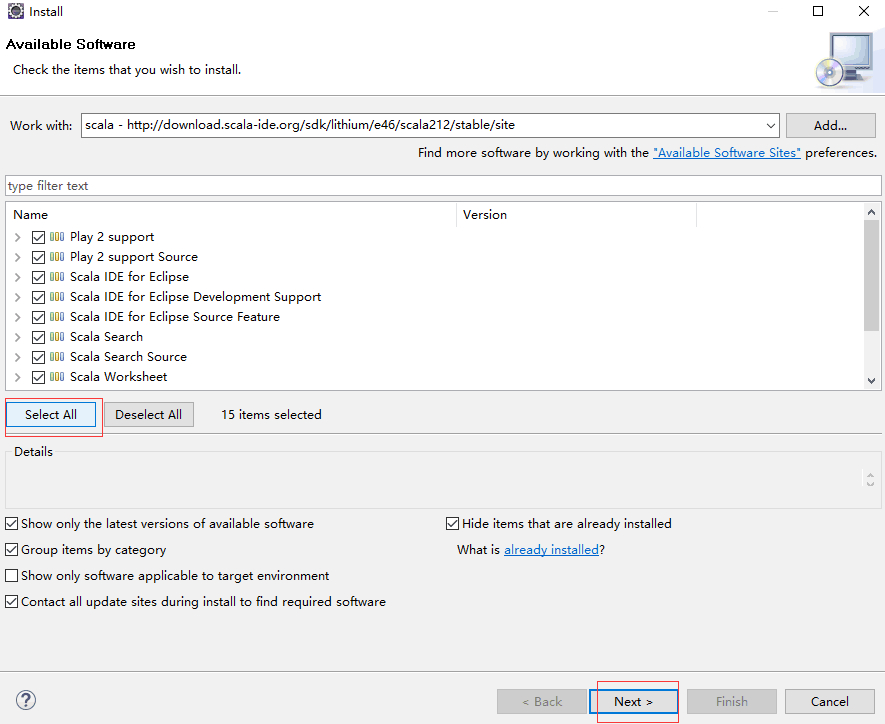
然后下一步下一步
中间有一个警告,点ok即可,最后根据提示重启eclipse即可安装完成5.1运行scala程序
5.1.1 新建scala project
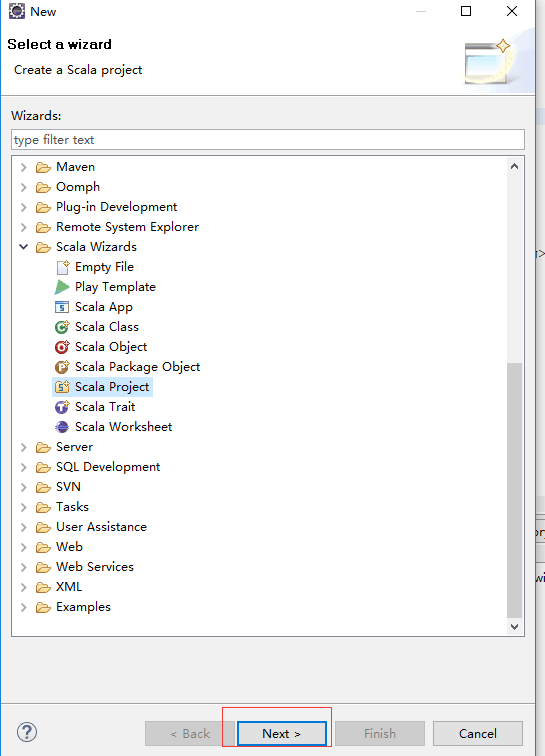
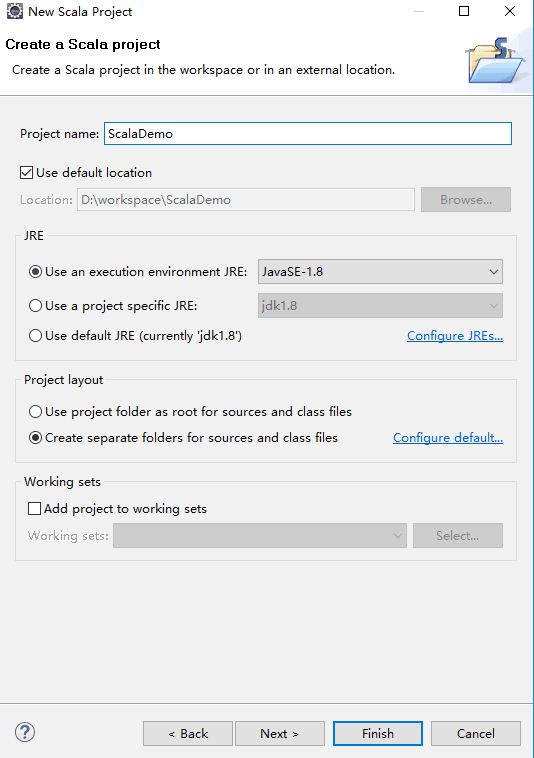
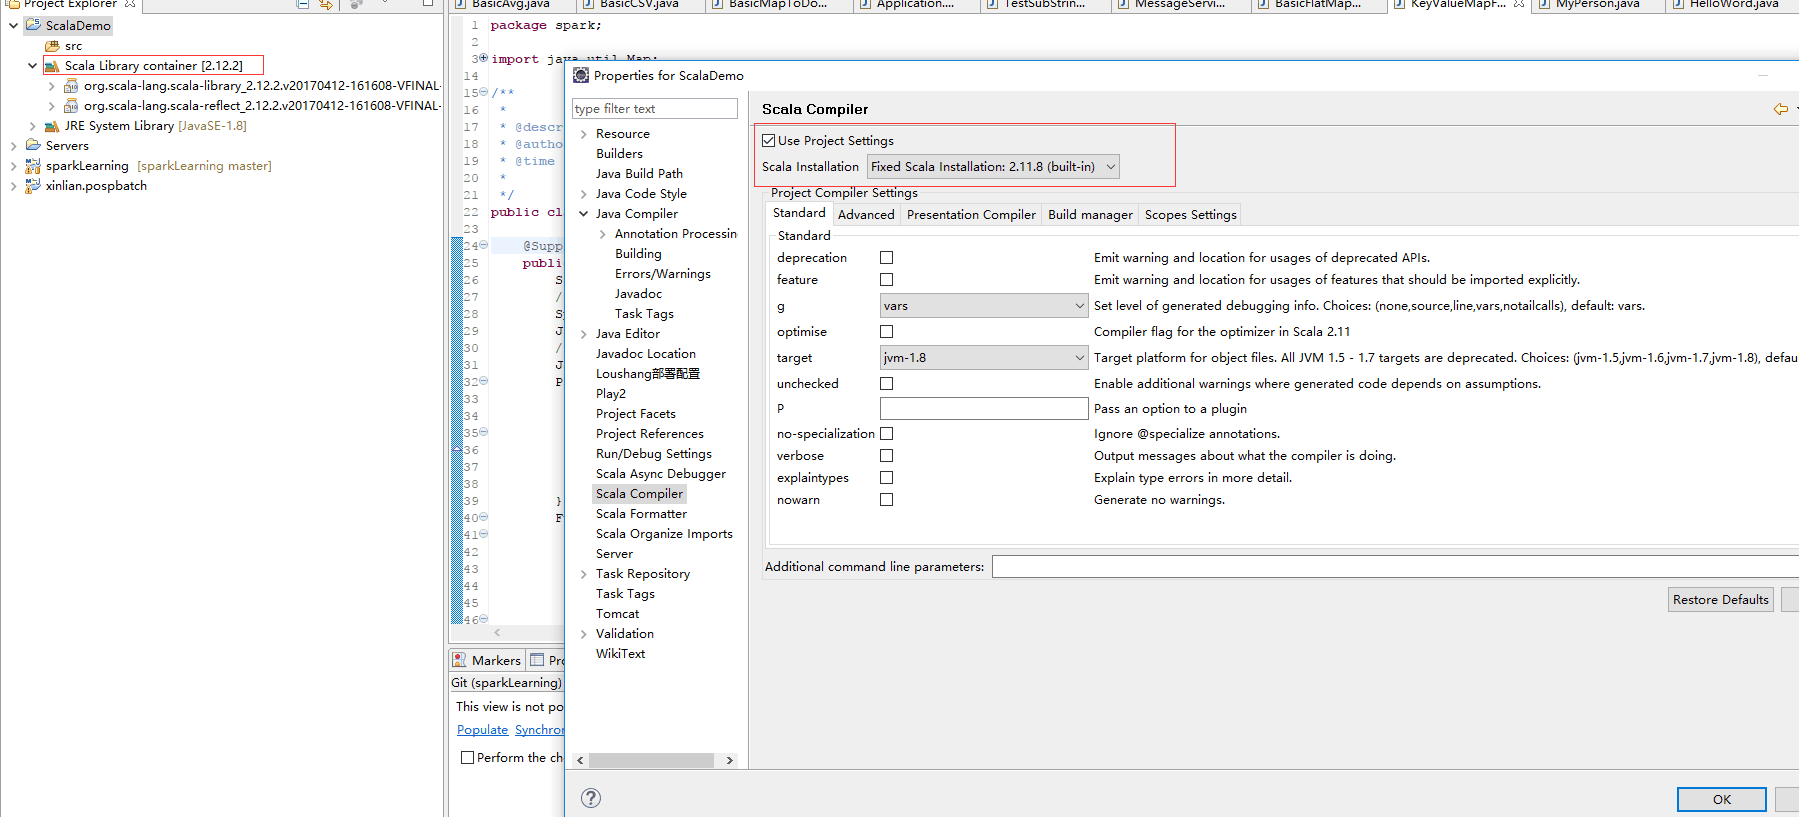
5.1.2 将默认的sacala版本改为之前安装的版本
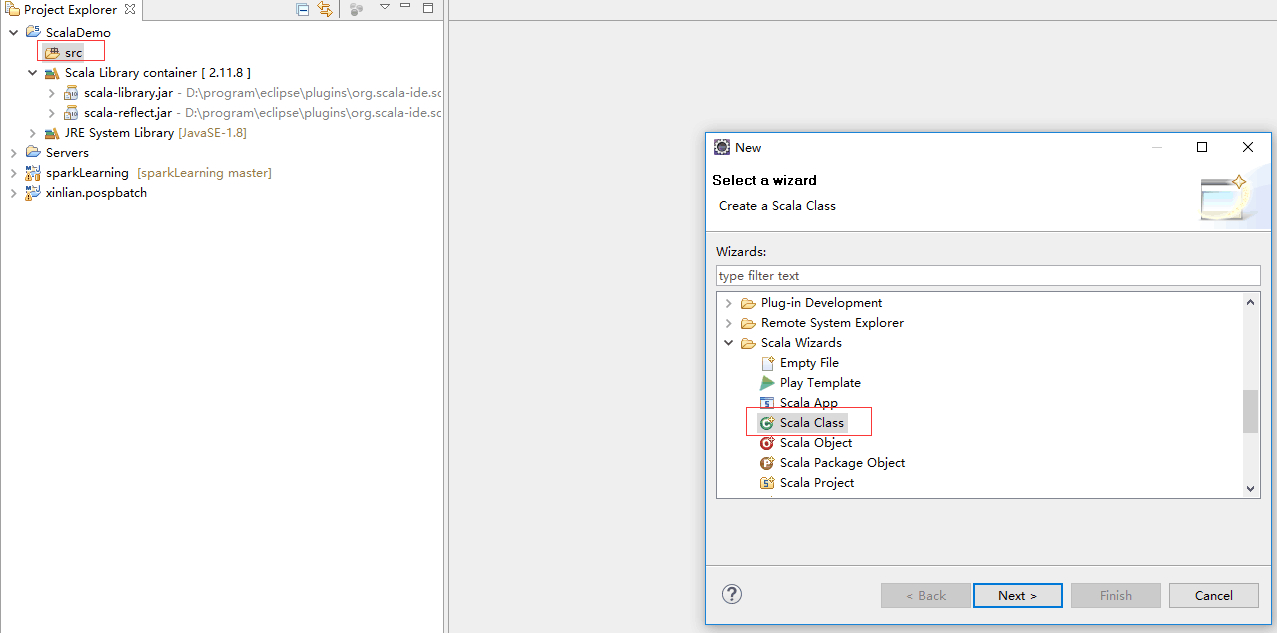
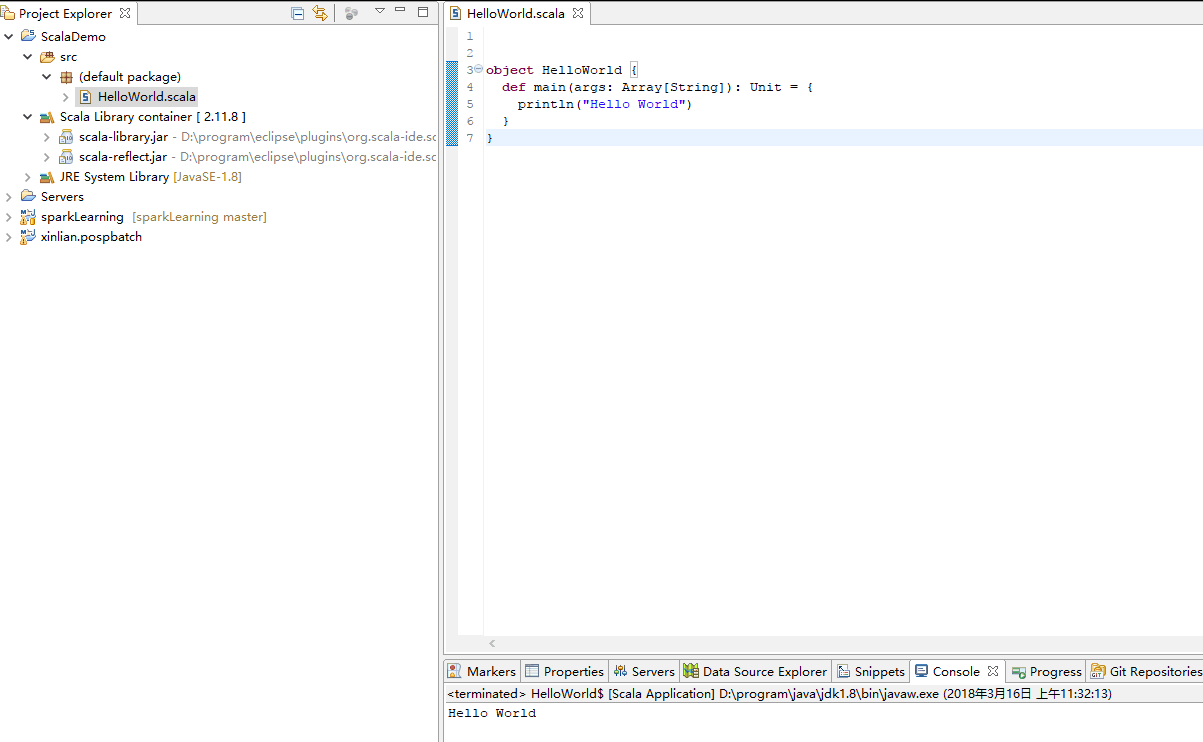
5.1.3 编写salca程序,即可像运行java一样运行scala
6、安装sbt
6.1 下载(sbt-1.1.1.msi)
下载地址:https://www.scala-sbt.org/download.html6.2 安装
一键式安装到指定目录:D:\Company\bigdata\scala-sbt6.3 配置环境变量
SBT_HOME=D:\Company\bigdata\scala-sbt
path=%SBT_HOME%\bin6.3 配置本地仓库
编辑:conf/sbtconfig.txt1
2
3
4
5
6
7
8
9
10
11
12
13
14
15
16
17# Set the java args to high
-Xmx512M
-XX:MaxPermSize=256m
-XX:ReservedCodeCacheSize=128m
# Set the extra SBT options
-Dsbt.log.format=true
-Dsbt.boot.directory=D:/Company/bigdata/scala-sbt/boot/
-Dsbt.global.base=D:/Company/bigdata/scala-sbt/.sbt
-Dsbt.ivy.home=D:/Company/bigdata/scala-sbt/.ivy2
-Dsbt.repository.config=D:/Company/bigdata/scala-sbt/conf/repo.properties
增加文件 conf/repo.properties1
2
3
4
5
6
7
8
9
10
11[repositories]
local
Nexus osc : https://code.lds.org/nexus/content/groups/main-repo
Nexus osc thirdparty : https://code.lds.org/nexus/content/groups/plugin-repo/
typesafe: http://repo.typesafe.com/typesafe/ivy-releases/, [organization]/[module]/(scala_[scalaVersion]/)(sbt_[sbtVersion]/)[revision]/[type]s/[artifact](-[classifier]).[ext], bootOnly
typesafe2: http://repo.typesafe.com/typesafe/releases/
sbt-plugin: http://repo.scala-sbt.org/scalasbt/sbt-plugin-releases/
sonatype: http://oss.sonatype.org/content/repositories/snapshots
uk_maven: http://uk.maven.org/maven2/
ibibli: http://mirrors.ibiblio.org/maven2/
repo2: http://repo2.maven.org/maven2/
6.4 验证
输入:sbt
(第一次使用会下载复制一些文件)
7、安装eclipse的sbt插件:sbteclipse
sbteclipse是eclipse的sbt插件,但与一般eclipse插件的配置及使用并不相同。
sbteclipse项目源码托管在github上:https://github.com/typesafehub/sbteclipse
(7.1和7.2不确定是否是必须的,一台机器不需要,另一台因在~/.sbt文件下没有1.0和0.13文件夹,执行这两步即可)
7.1 下载项目
1 | git clone https://github.com/sbt/sbteclipse.git |
或下载zip再解压
7.2 编译
进入到sbteclipse目录下,输入1
sbt compile
7.3 添加全局配置文件
新建:~/.sbt/1.0/plugins/plugins.sbt(网上好多说是:~/.sbt/0.13/plugins/plugins.sbt,但我两个电脑都不行)1
addSbtPlugin("com.typesafe.sbteclipse" % "sbteclipse-plugin" % "5.2.4")
7.4 进入到之前创建的项目ScalaDemo目录下
添加sbt配置文件build.sbt1
2
3
4
5
6
7
8
9
10
11
12name := "ScalaDemo"
version := "1.0"
scalaVersion := "2.11.8"
javacOptions ++= Seq("-source", "1.8", "-target", "1.8")
libraryDependencies ++= Seq(
"org.apache.spark" %% "spark-core" % "2.2.1"
)
输入 sbt 然后输入eclipse 等待相关的依赖下载完,就可以在eclipse 看到依赖的jar了
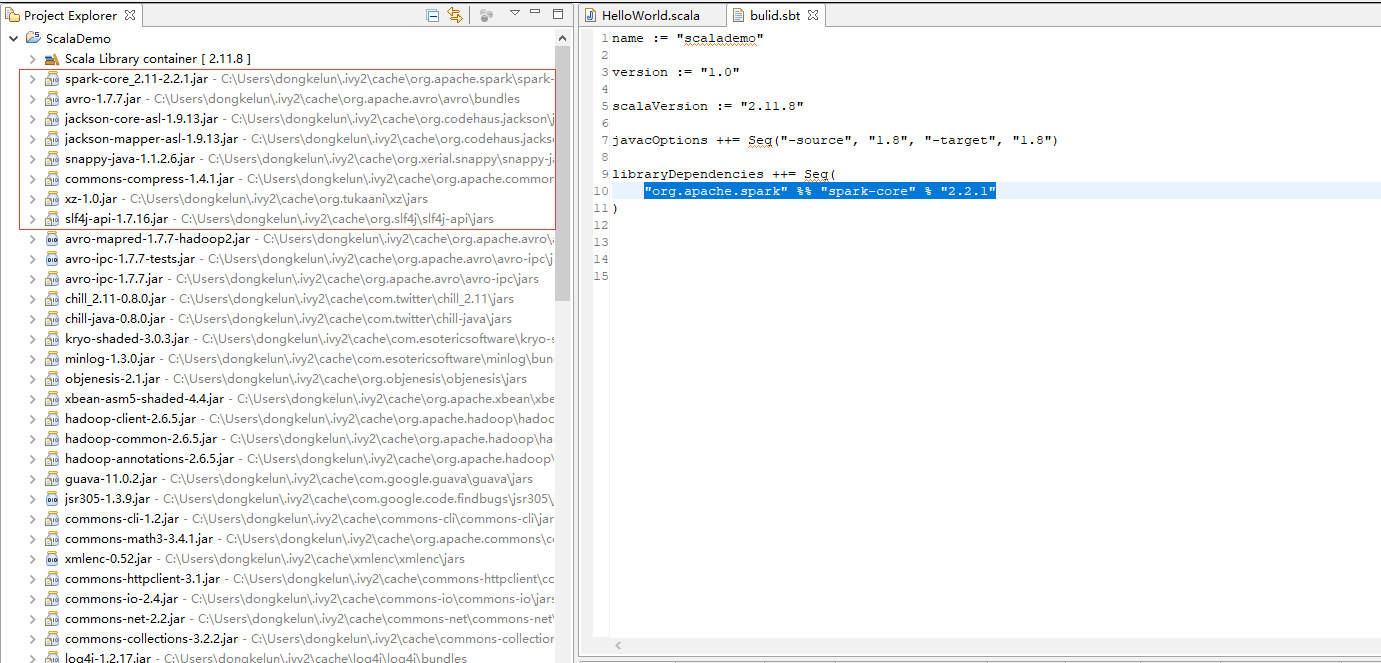
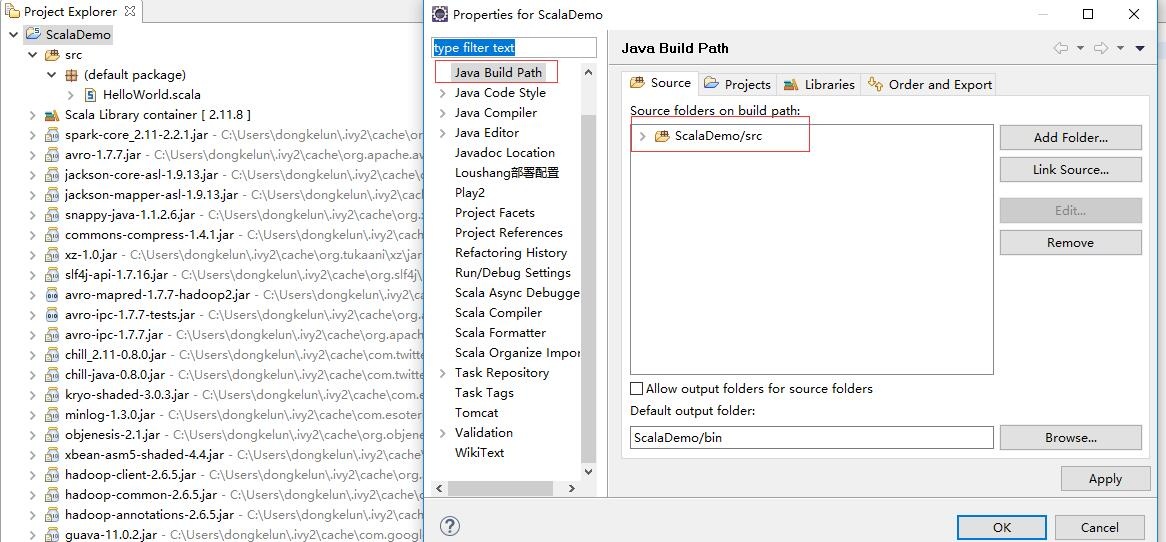
7.5 最后将src bulid path 一下,就可以在scala代码里导入spark包了
